
Camera and images
• STORE PICTURES IN IMAGES
Go to
Menu
→
Images
.
Images allows you to view, organize, delete,
and send photos and pictures stored in
your phone.
In Images you can organize photos:
•
Taken with the camera.
•
Sent to your Inbox in a multimedia
or a picture message, as an e-mail
attachment, through an infrared or
Bluetooth connection. After receiving
the image in Inbox, you need to save it in Images.
In the Images main view, you can see a list of photos and folders.
The list shows:
•
The date and time a photo or an image was taken or saved.
•
A small thumbnail picture, a preview of the image.
•
The number of images inside a folder.
•
A tab showing whether the photos or folders are located in the
phone’s memory or the memory card, if you use one.
Options in Images are:
Open
,
Send
,
Image uploader
,
Delete
,
Move to folder
,
New folder
,
Mark/Unmark
,
Rename
,
Receive via infrared
(only from a digital
camera that supports the IrTran-P protocol, otherwise use the Infrared
application, see “Send and receive data using infrared” on p. 146),
View
details
,
Add to Favorites
,
Help
, and
Exit
.
View images
Note: When you open
Images
and you use a memory card, the
starting tab is determined by which memory is selected as the
Memory in use
.
1
Press
or
to move from one memory tab to another.
[ 64 ]
2
To browse the images, press
and
.
3
Press
to open an image. When the image is open, you can see the
name of the image and the number of images in the folder on the top
of the display.
When you are viewing an image, pressing
or
takes you to the next
or previous picture in the current folder.
You can view animated GIF files in the same way as other images. Animations
are played only once. When an animation stops, you will see a fixed image.
To view the animation again, you must close it and then reopen it.
Options when viewing an image are:
Send
,
Rotate
,
Zoom in
,
Zoom out
,
Full screen
,
Delete
,
Rename
,
View details
,
Add to Favorites
,
Help
, and
Exit
.
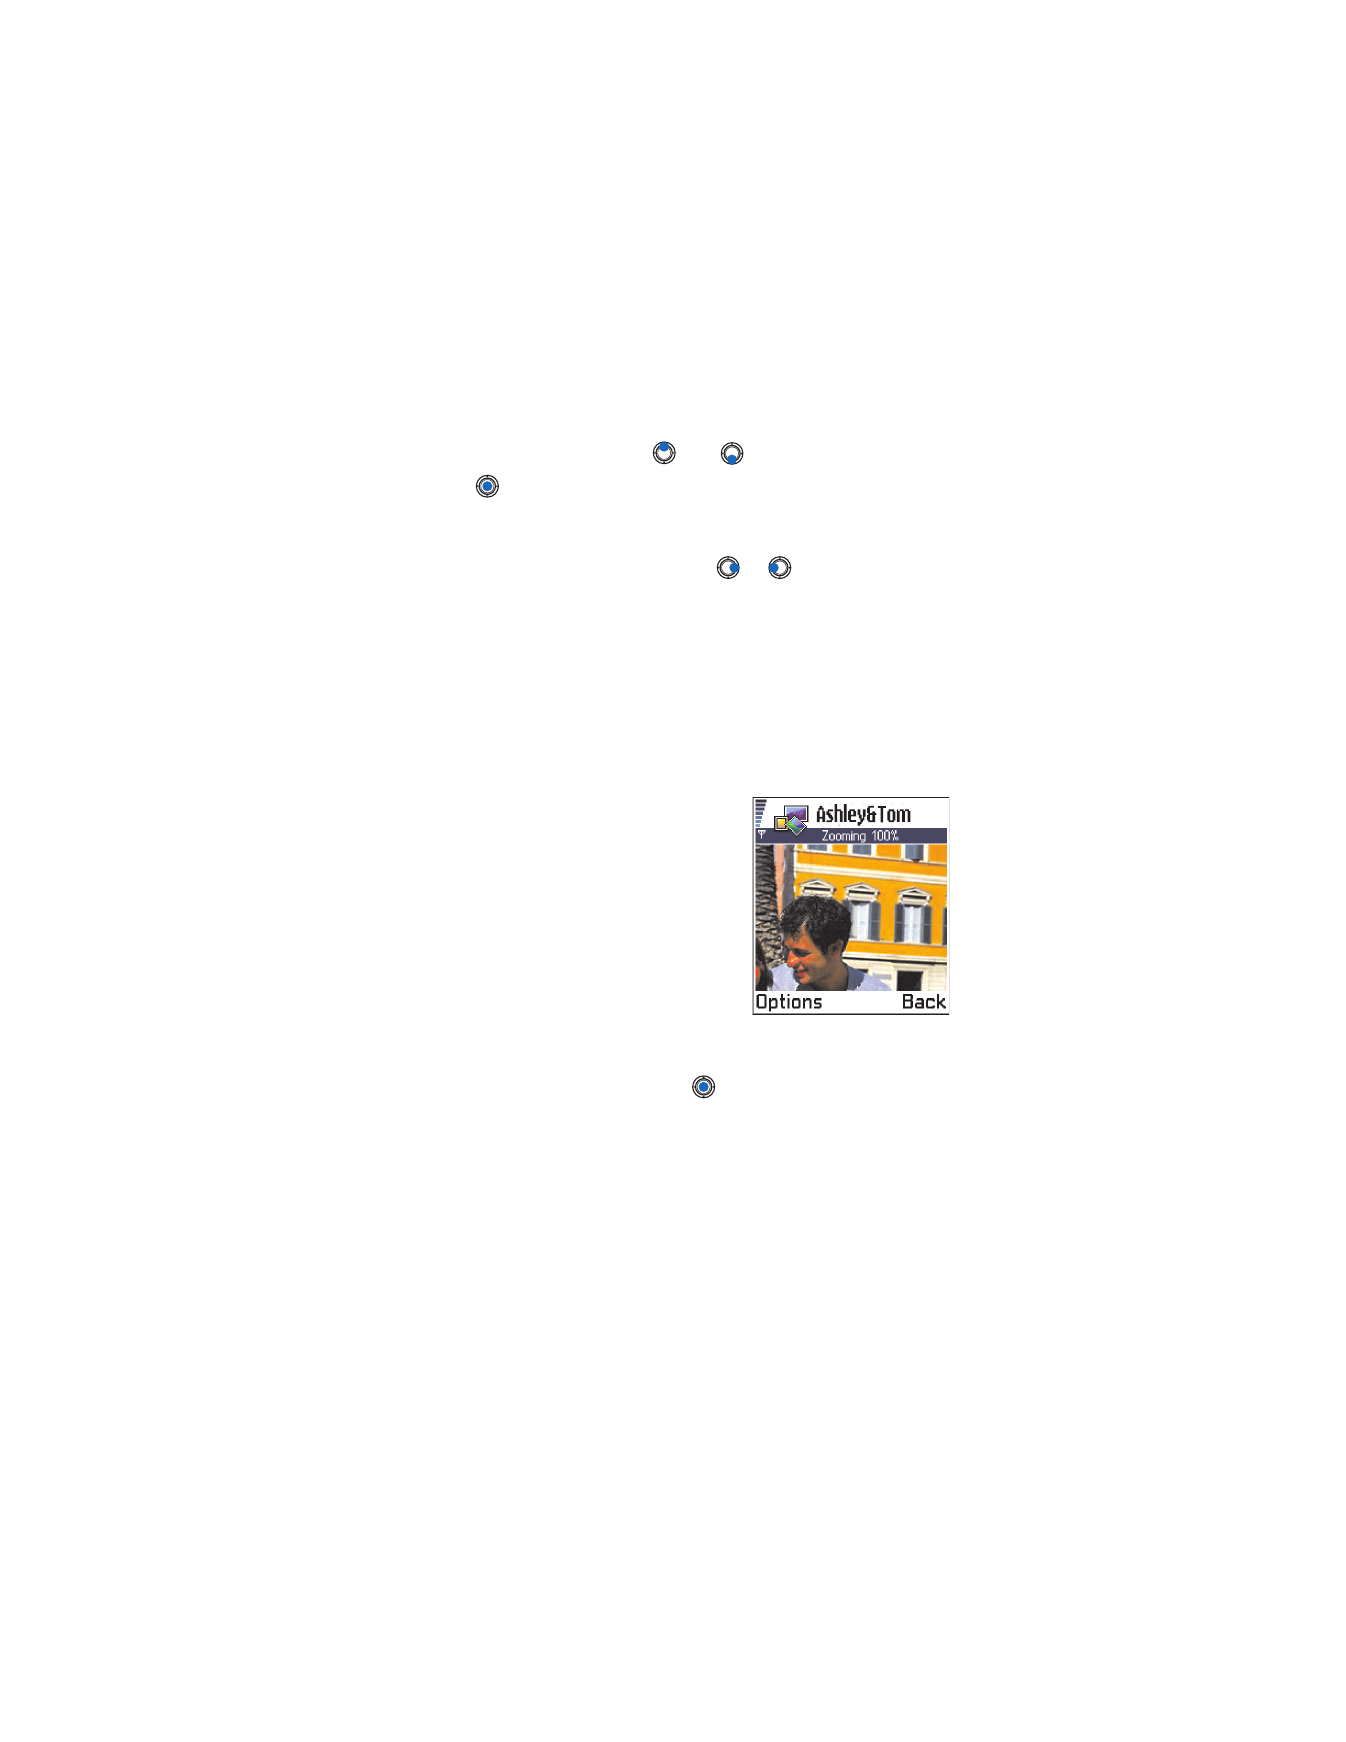
ZOOM IN OR ZOOM OUT
1
Select
Options
→
Zoom in
or
Zoom out
.
You can see the zooming ratio at the
top of the display. See also the section
‘Keyboard shortcuts’ later in this chapter.
2
Press
Back
to return to the initial view.
The zoom ratio is not stored permanently.
You cannot zoom in on GIF animations
while they are playing.
Full screen
When you select
Options
→
Full screen
, the
panes around the picture are removed so that
you can see more of the image. Press
to
go back to the initial view.
Move the focal point
When you are zooming or viewing an image in full screen mode, use the
Scroll key to move the focal point to the left, right, up, or down, so that
you can take a closer look at one part of the picture, for example, its upper
right corner.

[ 65 ]
Camera and images
Rotate
Select
Options
→
Rotate
→
Left
to rotate an image 90 degrees
counterclockwise or
Right
to rotate the image clockwise. The rotation
status is not stored permanently.
KEYBOARD SHORTCUTS
•
Rotate: 2 key—counterclockwise, 9 key—clockwise.
•
Scroll:
—up,
—down,
—left,
—right.
•
Zoom: 1 key—zoom in, 0 key—zoom out. Press and hold to return to
the normal view.
•
Change between full screen and normal view: the * key.
IMAGE DETAILS VIEW
To view the detailed information about an image, scroll to the image and
select
Options
→
View details
. A list of image information appears:
Format
—
JPEG
,
GIF
,
PNG
,
TIFF
,
MBM
,
BMP
,
WBMP
,
OTA
,
WMF
,
Unsupported
, or
Unknown
.
Date
and
Time
—when the image was created or saved, n x n- the size
of the image in pixels.
Resolutn.
—the size of the image in pixels. See “Image resolutions”
on p. 61.
Size
—in bytes or kilobytes.
Color
—
True color
,
65536 colors
,
4096 colors
,
256 colors
,
16 colors
,
Grayscale
, or
Black/white
.
Arrange images and folders
•
To remove an image or folder, scroll to it and select
Options
→
Delete
.
•
To rename an image or a folder, scroll to the image or folder you
want to rename and select
Options
→
Rename
. Write the new
name and press
.
See “Actions common to all applications” on p. 17 for further information
on how to create folders and mark and move items to folders.

[ 66 ]
Send images
You can send photos or images by different messaging services.
1
Scroll to the image you want to send and select
Options
→
Send
.
2
Then select the method. The choices are
Via multimedia
,
Via e-mail
,
Via infrared
, or
Via Bluetooth
.
•
If you select to send the image in an e-mail or a multimedia
message, an editor opens. Press
to select the recipient(s) from
the Contacts directory or write the phone number or e-mail
address of the recipient in the
To:
field. Add text or sound and
select
Options
→
Send
. For more information, see “Create and
send new messages” on p. 80.
•
If you want to send the image by infrared or Bluetooth connection,
see “Send data using Bluetooth connection” on p. 142, and “Send
and receive data using infrared” on p. 146 for more information.
Picture messages folder
Options in the Picture messages folder are:
Open
,
Send
,
Delete
,
Mark/Unmark
,
Rename
,
View details
,
Help
, and
Exit
.
In the Picture messages folder, you can find graphics sent to you in
picture messages.
If you want to save a graphic you have received in a picture message, go to
Messaging
→
Inbox
, open the message, and select
Options
→
Save picture
.
VIEW PICTURES
1
Scroll to the picture you want to view and press
. The picture
opens. Press
to view the next picture in the folder.
2
Press
Back
to return to the Pictures main view.
[ 67 ]
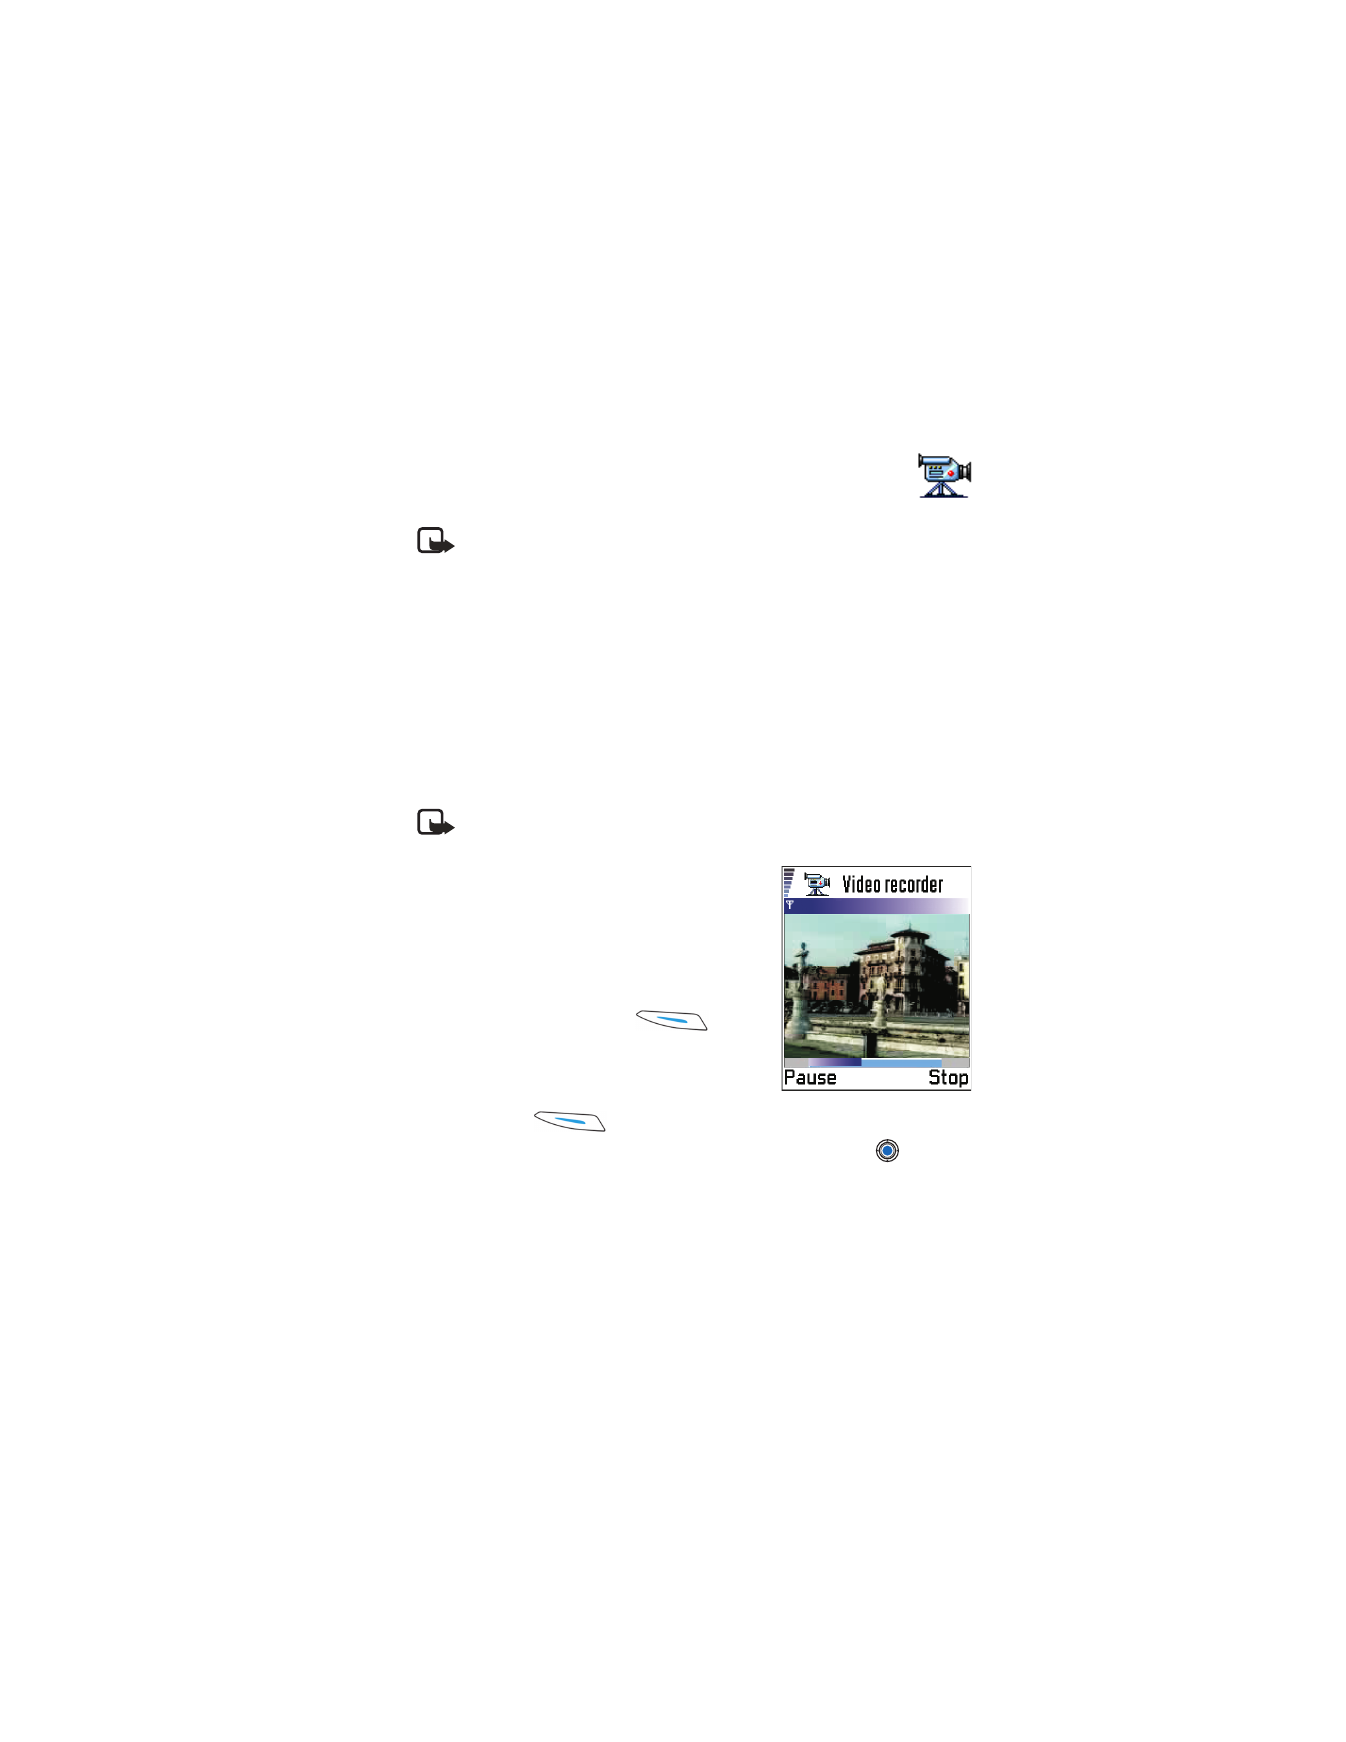
Video recorder
7
Video recorder
Go to
Menu
→