Add a picture to a contact card
There are two different types of pictures you can add to a contact card.
See “Camera and images” on p. 59 for more information on how to take
and store pictures.
•
To attach a small thumbnail image to a contact card, open a contact
card, select
Options
→
Edit
and then select
Options
→
Add thumbnail
.
The thumbnail image is also shown when the contact is calling you.
Note: After you attach a thumbnail image to a contact card, you can
select
Add thumbnail
to replace the image with a different thumbnail
or
Remove thumbnail
to remove the thumbnail from the contact card.
•
To add an image to a contact card, open a contact card, and press
to open the image view (
). To attach an image, select
Options
→
Add image
.
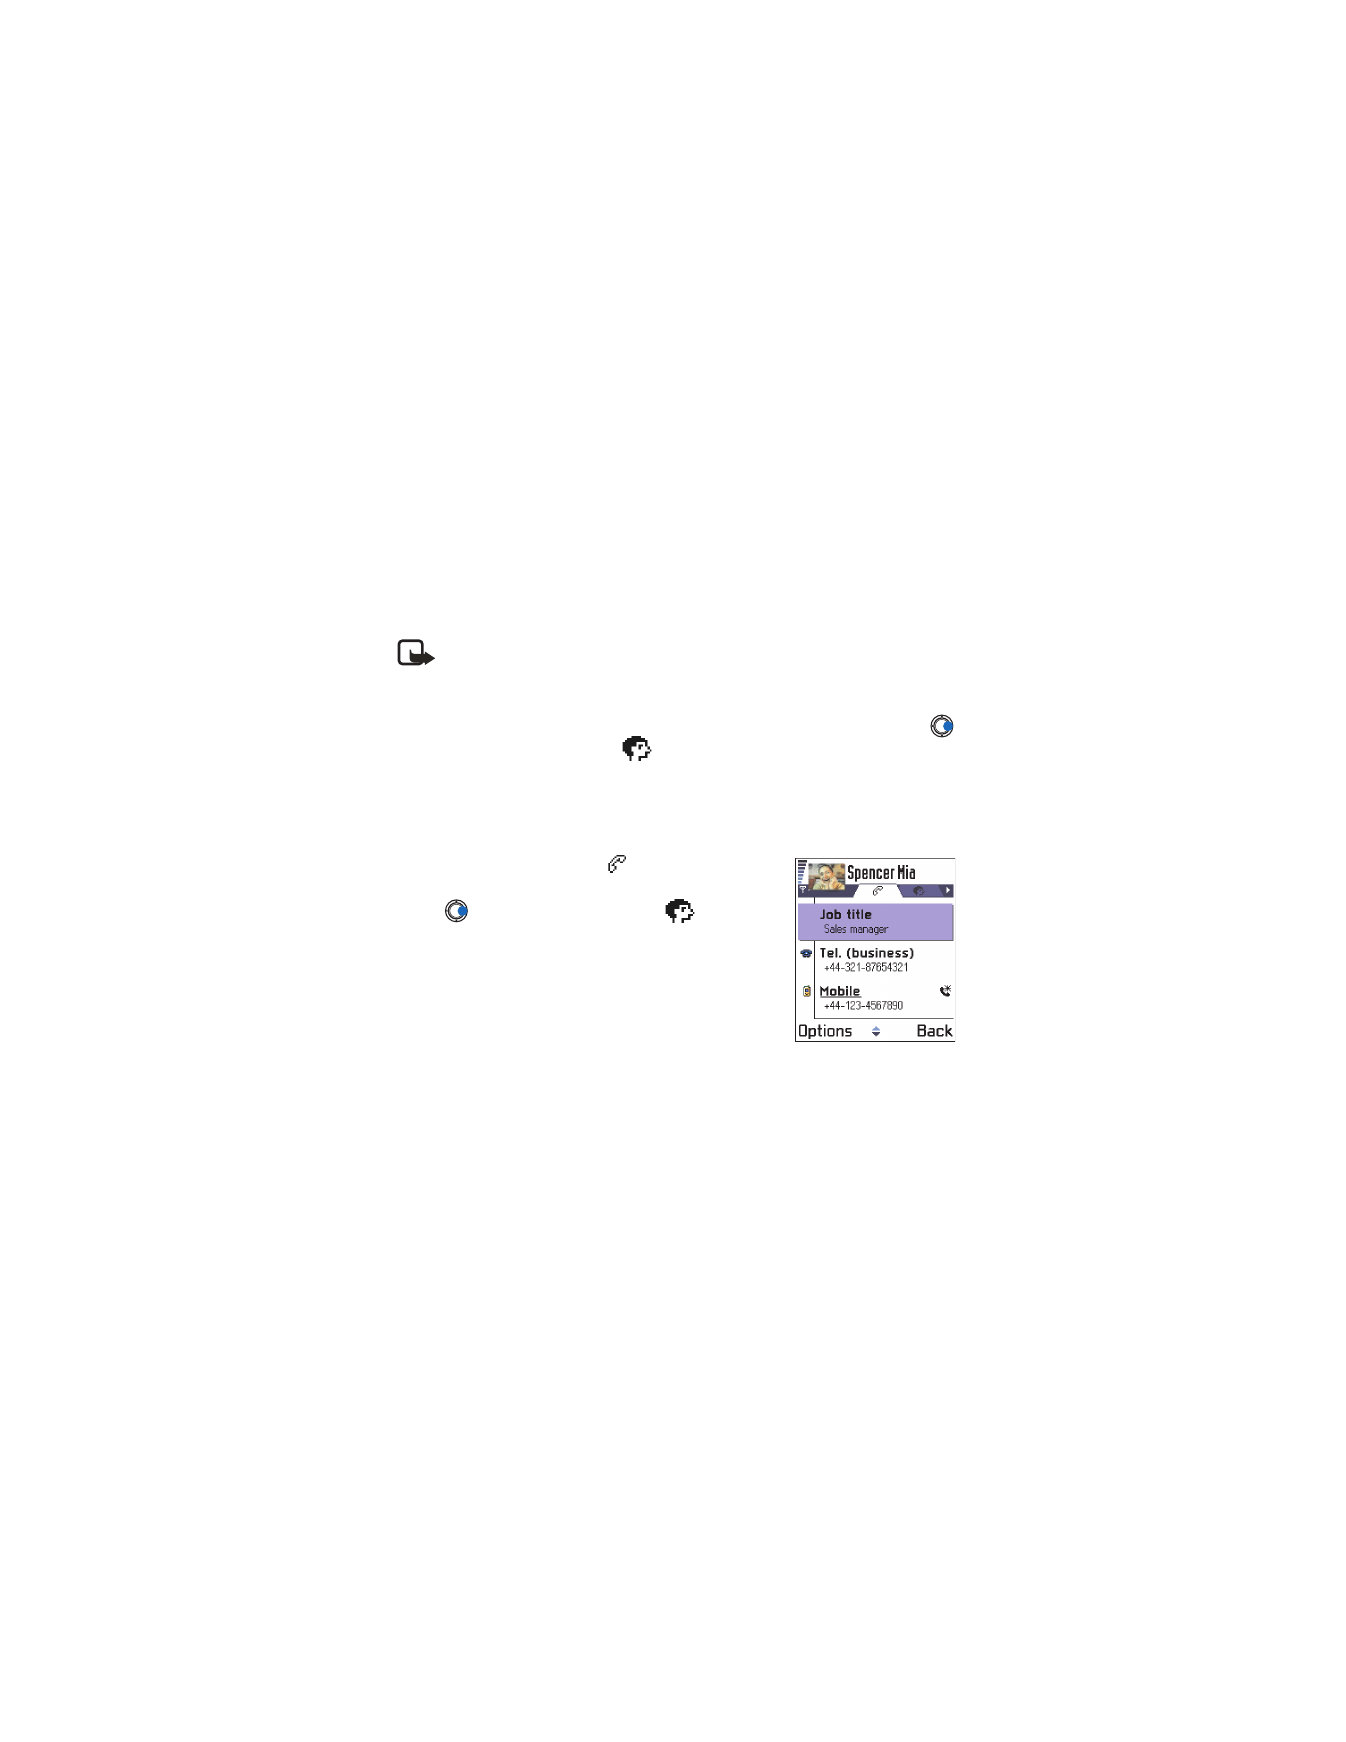
• VIEW A CONTACT CARD
Contact information view (
) shows all
information inserted in the contact card.
Press
to open the Image view
.
Only fields that have information are displayed in
the contact information view. Select
Options
→
Edit
if you want to see all fields and add more
data to the contact.
Options when viewing a contact card (when the
selection is on a phone number) are:
Call
,
Create message
,
Edit
,
Delete
,
Defaults
,
Add voice tag
/
Voice tags
,
Assign 1-touch dial
/
Remove 1-touch
dial
,
Ringing tone
,
Copy to SIM direct.
,
Send business card
,
Help
,
and
Exit
.
Assign default numbers and addresses
If a contact has several phone numbers or e-mail addresses, to speed
up calling and sending messages, you can define certain numbers and
addresses to be used as the default.

[ 53 ]
Contacts
Open a contact card and select
Options
→
Defaults
. A pop-up window
opens, listing the different options.
Example: Scroll to
Phone number
and press
Assign
. A list of phone numbers
in the selected contact card is shown. Scroll to the one you want to have
as the default and press
. When you return to the contact card view,
you can see the default number underlined.
Voice dialing
You can make a phone call by saying a voice tag that has been added to
a contact card. Any spoken word(s) can be a voice tag. Before using voice
dialing, note that:
•
Voice tags are not language dependent. They are dependent on the
speaker's voice.
•
Voice tags are sensitive to background noise. Record them and make
calls in a quiet environment.
•
Very short names are not accepted. Use long names and avoid similar
names for different numbers.
Example: You can use a person’s name for a voice tag, for example,
“John’s cell”.
Note: You must say the name exactly as you said it when you
recorded it. This may be difficult in a noisy environment or during
an emergency, so you should not rely solely upon voice dialing in
all circumstances.
ADD A VOICE TAG TO A PHONE NUMBER
Voice tags can be any spoken words, for example, a person’s first name.
Voice tags allow you to make phone calls by simply saying the word aloud.
You can have only one voice tag per contact card. Voice tags can only be
added to phone numbers stored in phone memory. See “Copy between SIM
card and phone memory” on p. 50.
1
In the Contacts directory, scroll to the contact to which you want to
add a voice tag and press
to open the contact card.

[ 54 ]
2
Scroll to the number to which you want to add the voice tag and
select
Options
→
Add voice tag
.
Press Start, then speak after tone
is displayed.
3
Press
Start
to record a voice tag. The phone sounds a starting tone
and
Speak now
is displayed.
When recording, hold the phone a short distance from your mouth.
After the starting tone, say clearly the word(s) you want to record as
a voice tag.
4
After recording, the phone plays the recorded tag and
Playing voice
tag
is displayed. If you do not want to save the recording, press
Quit
.
5
When the voice tag has been successfully saved,
Voice tag saved
is
displayed and a beep sounds. A symbol
can be seen next to the
number in the contact card.
Note: Your phone may have 30 phone numbers to which voice
tags are attached. If the memory becomes full, delete some of
the voice tags.
To view a list of voice tags you have defined, select
Options
→
Contacts
info
→
Voice tags
in the Contacts directory.
MAKE A CALL BY SAYING A VOICE TAG
Note: You must say the voice tag exactly as you said it when you
recorded it.
1
In the standby mode, press and hold
. A short tone is played
and the note
Speak now
is displayed.
2
When you are making a call by saying a voice tag, the loudspeaker is
in use. Hold the phone at a short distance away from your mouth and
face and say the voice tag clearly.
3
The phone plays the original voice tag, displays the name and number,
and after 1.5 seconds dials the number of the recognized voice tag.
If the phone plays the wrong voice tag or to retry voice dialing, press
Retry
.

[ 55 ]
Contacts
Note: When an application using a data call or GPRS connection is
sending or receiving data, you cannot make a call by using voice
dialing. To make a call by using a voice tag, end all active data
connections.
REPLAY, ERASE, OR CHANGE A VOICE TAG
1
To replay, erase, or change a voice tag, open the Contacts directory
and select
Options
→
Contacts info
→
Voice tags
.
A list of contacts with voice tags is displayed.
2
Scroll to a contact, select
Options
, and then select one of the following:
Playback
to listen to the voice tag again.
Delete
to erase the voice tag.
Change
to record a new voice tag instead of the old one. Press
Start
to record.
Assign 1-touch dialing keys
1-touch dialing is a quick way to call frequently
used numbers. You can assign 1-touch dialing
keys to eight phone numbers. Number 1 is
reserved for the voice mailbox.
1
Open the contact card for which you want a
1-touch dialing key and select
Options
→
Assign 1-touch no
. The 1-touch dialing grid
opens, showing you the numbers from 1–9.
2
Scroll to a number and press
Assign
. When you return to the contact
information view, you can see the 1-touch dial icon next to the number.
To call the contact by 1-touch dialing, go to the standby mode and press
the 1-touch dialing key and
.

[ 56 ]
Add a ringing tone for a contact card or group
You can set a ringing tone for each contact card and group. When that
contact or group member calls you, the phone plays the chosen ringing
tone (if the caller’s telephone number is sent with the call and your phone
recognizes it).
1
Press
to open a contact card or go to the Groups list and select a
contact group.
2
Select
Options
→
Ringing tone
. A list of ringing tones opens.
3
Use the scroll key to select the ringing tone you wish to use for the
contact or group and press
Select
.
To remove the ringing tone, select
No personal tone
from the list of
ringing tones.
Note: For an individual contact, the phone will always use the
ringing tone that was assigned last. So, if you first change a group
ringing tone and then the ringing tone of a single contact that
belongs to that group, the ringing tone of the single contact will
be used when the contact calls you the next time.
To listen to a ringing tone, go to Recorder.
Send contact information
You can send contact information through text message, e-mail,
Bluetooth connection, or infrared connection.
1
In the Contacts directory, scroll to the card you want to send.
2
Select
Options
→
Send
then select the method; the choices are:
Via
text message
,
Via e-mail
(available only if the correct e-mail settings
are in place),
Via Bluetooth
, or
Via Infrared
.
For further information, see the ‘Messaging’ chapter, “Send and receive
data using infrared” on p. 146, and “Send data using Bluetooth connection”
on p. 142.
You can add received contact cards to your Contacts directory.
See “Receive smart messages” on p. 90 for further information.

[ 57 ]
Contacts
Note: When you send or receive contact information, the term
‘business card’ is used. A business card is a contact card in a format
suitable to be sent in a text message, usually in ‘vCard’ format.
• MANAGE CONTACT GROUPS
Options in the Groups list view are:
Open
,
New group
,
Delete
,
Rename
,
Ringing tone
,
Contacts info
,
Help
, and
Exit
.
You can create contact groups that can, for example, be used as distribution
lists for sending text messages and e-mail. See “Add a ringing tone for a
contact card or group” on p. 56.