for missed calls
for received calls
for dialed numbers

[ 27 ]
Your phone
MISSED CALLS AND RECEIVED CALLS
To view the phone numbers of the last 20 missed calls, go to
Log
→
Recent
calls
→
Missed calls
.
When you see a note in the standby mode about missed calls, press
Show
to access the list of missed calls. To call back, scroll to the number or name
you want and press
.
To view a list of the 20 numbers or names from which you have most
recently accepted calls (system service), go to
Log
→
Recent calls
→
Received calls
.
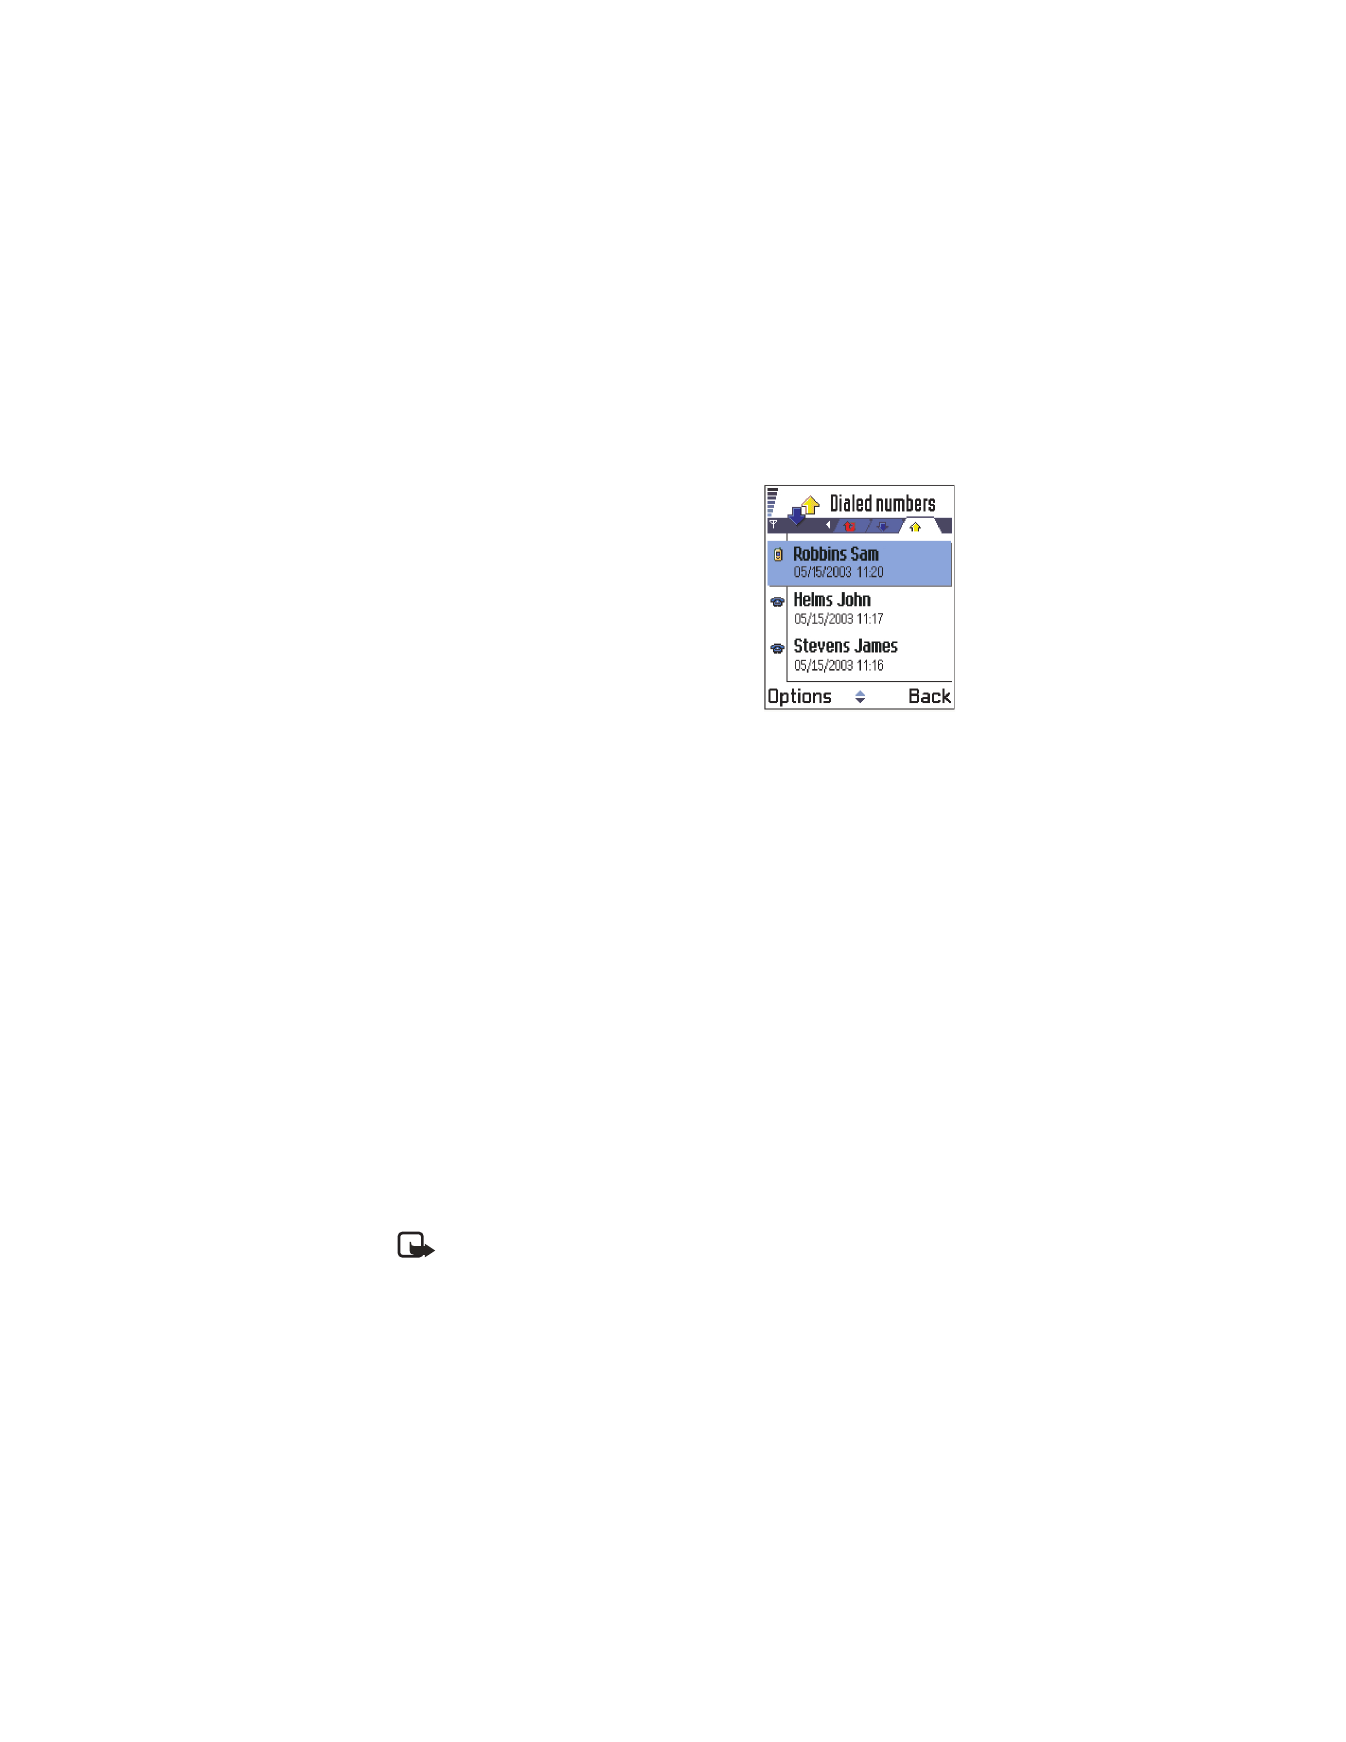
DIALED NUMBERS
Press
in the standby mode to open the Dialed numbers view.
To view the 20 phone numbers that you have most recently called or
attempted to call, go to
Log
→
Recent calls
→
Dialed numbers
.
ERASING RECENT CALL LISTS
•
To clear all recent call lists, select
Options
→
Clear recent calls
in the
Recent calls main view.
•
To clear one of the call registers, open the
log
you want to erase and
select
Options
→
Clear list
.
•
To clear an individual event, open a
log
, scroll to the event,
and press
.
Call timers
Go to
Menu
→
Log
→
Call timers
.
Allows you to view the duration of your incoming and outgoing calls. If
you want the call duration timer to be displayed during your active calls,
select
Log
→
Call timers
, and then select
Options
→
Settings
→
Show call
duration
→
Yes
.
Note: Some timers, including the life timer, may be reset during
service or software upgrades.
Erasing call duration timers—Select
Log
→
Call timers
, and then select
Options
→
Clear timers
. For this you need the lock code. See “Security” on
p. 44. To clear an individual event, scroll to it and press
.
[ 28 ]
Call costs (system service)
Go to
Log
→
Call costs
.
Call costs allows you to check the cost of
the last call or all calls. The call costs are
displayed separately for each SIM card.
The actual invoice for calls and services from
your service provider may vary, depending
upon system features, rounding-off for
billing, taxes, and so forth.
CALL COSTS LIMIT
Your service provider can limit the cost of
your calls to a certain amount of charging units or units of currency.
When the limited charging mode is active, calls can be made only as long
as the preset credit limit (call cost limit) is not exceeded and you are in a
system that supports call cost limit. The number of remaining units is
shown during a call and in the standby mode. When the charging units
have expired, the note
Call cost limit reached
is displayed. Contact your
service provider for information on the limited charging mode and
charging unit prices.
COST SHOWN AS CHARGING UNITS OR CURRENCY
You can set the phone to show the remaining talk-time in charging units
or units of currency. For this, you may need the PIN2 code. See “Security”
on p. 44.
1
Select
Options
→
Settings
→
Show costs in
. The options are
Currency
and
Units
.
2
If you choose
Currency
, a note requesting you to write the unit price
is shown. Key in the cost of your home system charging or credit unit
and press
OK
.
3
Write a name for the currency. Use a three-letter abbreviation, for
example, USD.
Note: When no more charging units or currency units are left, calls
may only be possible to the emergency number programmed into
your phone (such as 911 or other official emergency numbers).

[ 29 ]
Your phone
SET A CALL COST LIMIT
1
Select
Options
→
Settings
→
Call cost limit
→
On
.
2
The phone requests you to enter the limit in units. For this you may
need the PIN2 code. Depending on the
Show costs in
setting, enter
either the amount of charging units or currency.
When the charging limit you have set yourself is reached, the counter
stops at its maximum value and the note
Reset all calls' cost counter
is
displayed. To be able to make calls, go to
Options
→
Settings
→
Call cost
limit
→
Off
. For this you need the PIN2 code. See “Security” on p. 44.
Note: The actual invoice for calls and services from your service
provider may vary, depending upon system features, rounding-off for
billing, taxes and so forth.
ERASE CALL COST COUNTERS
Select
Options
→
Clear counters
. For this you need the PIN2 code. To clear
an individual event, scroll to it and press
.
GPRS data counter
Go to
Log
→
GPRS counter
.
Allows you to check the amount of data sent and received during packet
data (GPRS) connections. Check with your service provider for information
on how you will be charged.
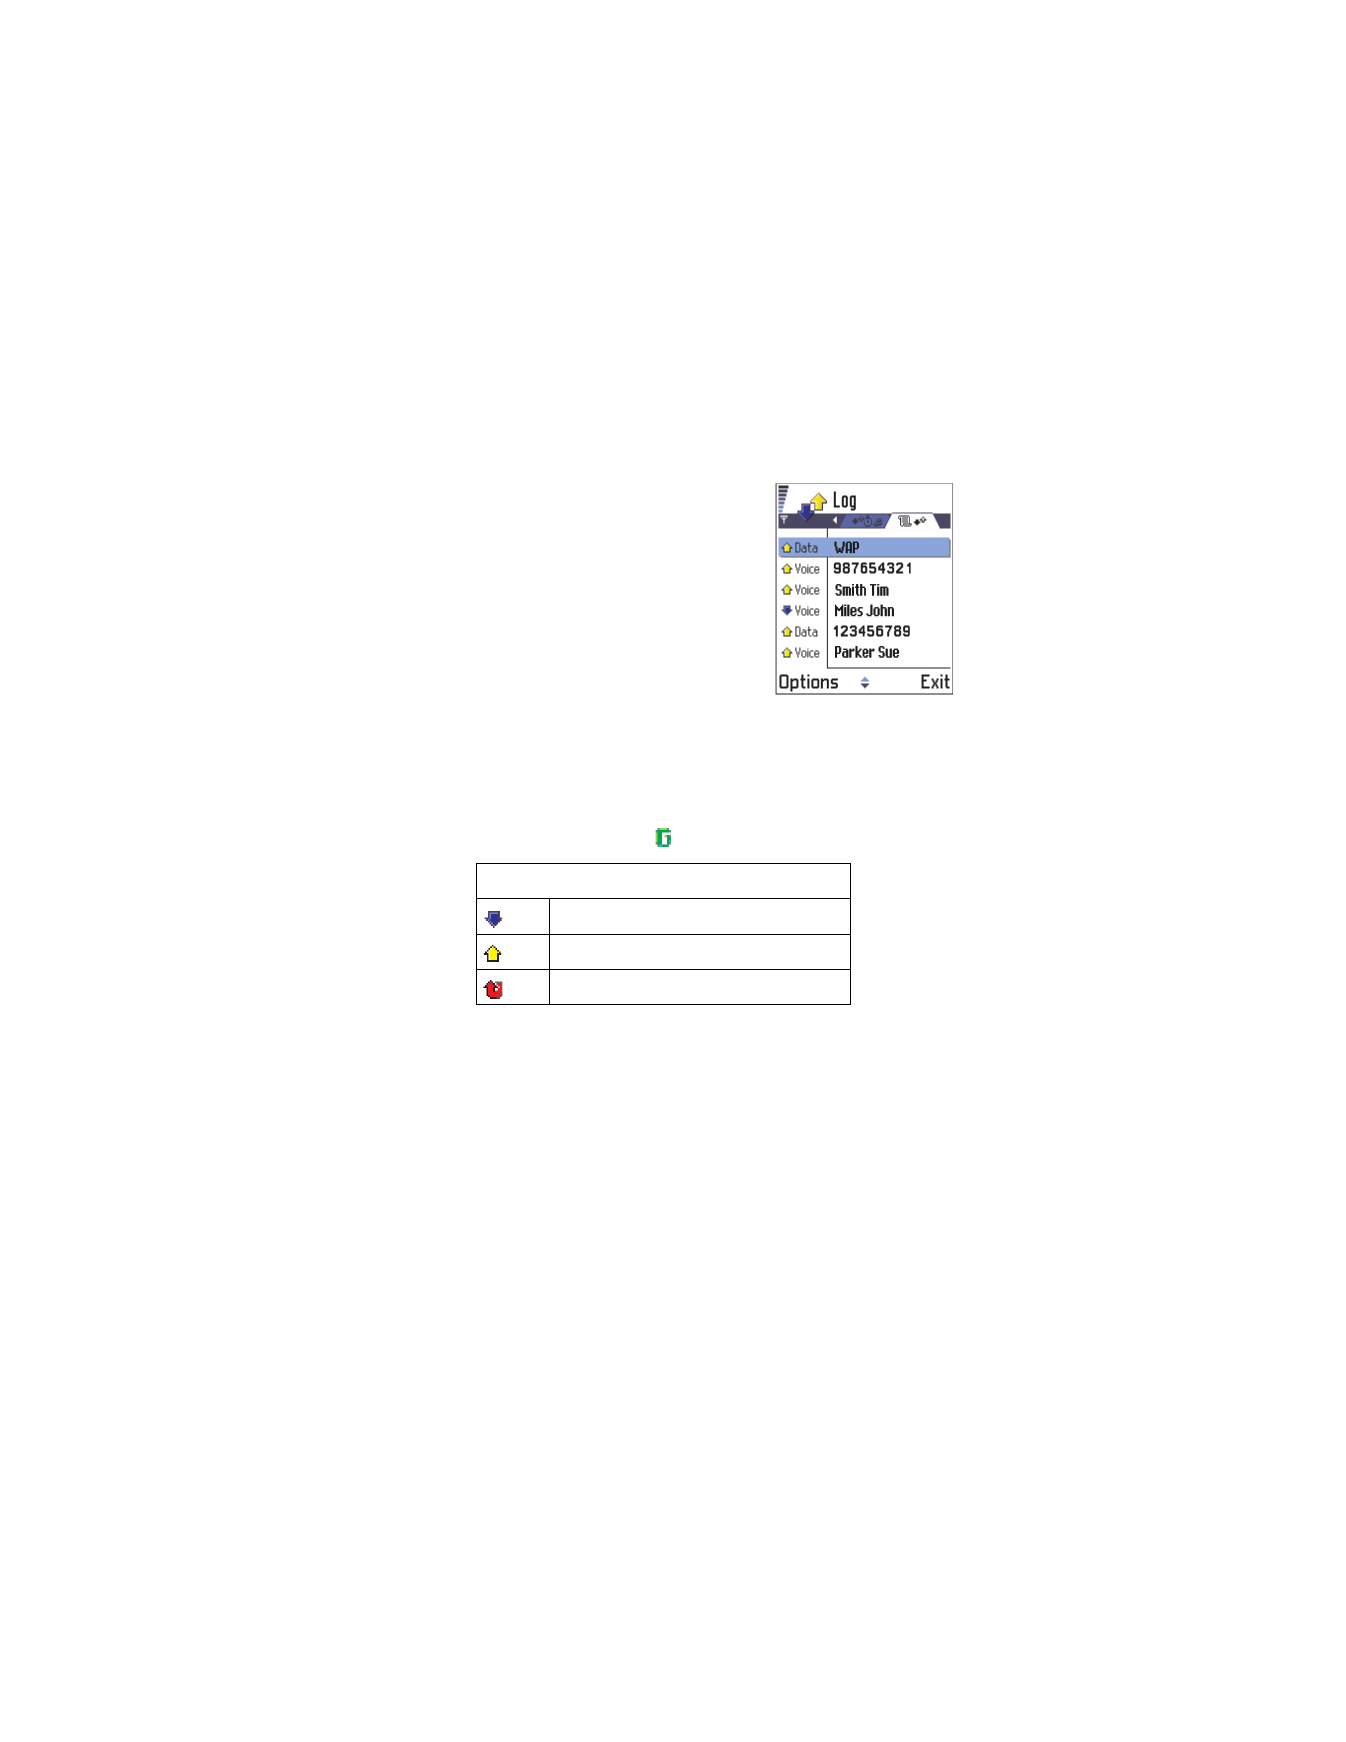
View the general log
Go to
Menu
→
Log
and press
.
In the general log, for each communication event, you can see the
sender or recipient name, phone number, name of the service provider,
or access point.
Note: Sub-events, such as a text message sent in more than
one part and packet data connections, are logged as one
communication event.
[ 30 ]
FILTER THE LOG
1
Select
Options
→
Filter
. A list of
filters opens.
2
Scroll to a filter and press
Select
.
You cannot get to the Filter option unless
there are already calls in the log.
ERASE THE CONTENTS OF THE LOG
To permanently erase all the log contents,
recent calls log, and messaging delivery
reports permanently, select
Options
→
Clear log
. Confirm by pressing
OK
.
PACKET DATA COUNTER AND CONNECTION TIMER
To view how much data, measured in kilobytes, has been transferred and how
long a certain GPRS connection has lasted, scroll to an Incoming or Outgoing
event with the access point icon
and select
Options
→
View details
.
LOG SETTINGS
Select
Options
→
Settings
. The list of settings opens.
•
Log duration
—The log events remain in the phone memory for a
set number of days after which they are automatically erased to
free memory.
If you select
No log
, all the log contents, Recent calls log, and
Messaging delivery reports are permanently deleted.
•
For
Call duration
,
Show costs in
,
Call cost limit
, see “Call timers” on
p. 27 and “Call costs (system service)” on p. 28.
Icons
for incoming
for outgoing
for missed communication events

[ 31 ]
Your phone
• SIM FOLDER
Go to
Menu
→
SIM
.
Your SIM card may provide additional services that you can
access in this folder. See also “Copy between SIM card and phone
memory” on p. 50, “Confirm SIM service actions” on p. 46, “Fixed dialing”
on p. 45, and “View messages on a SIM card” on p. 98.
In the SIM directory, you can see the names and numbers stored on the
SIM card, you can add or edit them, and you can make calls. To view the
SIM directory, go to
Menu
→
SIM
→
SIM direct
.
Options in the SIM directory are:
Open
,
Call
,
New SIM Contact
,
Edit
,
Delete
,
Mark/Unmark
,
Copy to Contacts
,
Own numbers
,